Bastelarbeiten für Jungs: kreativ sein mit Dosen, Nägeln, Speckstein bearbeiten, LED und beim Herstellen einer Rakete
Bei diesem Artikel handelt es sich um einen Forum Heft-Artikel und er ist vollständig als pdf unten angefügt - hier sind nur Auszüge wiedergegeben.
Boys and crafts?! No way? Of course it’s possible!
Don’t be afraid of hammers, nails, saws, tin snips, soldering irons, and so on! You can create fun, glowing, noisy, and flying objects. How could that not be fun!?
Boys love to tinker, too—as long as it makes noise and they get to use real tools! Here are a few ideas.
Hammering a lantern
Materials:
- a regular, empty tin can that was filled to the brim with water, placed in the freezer, and allowed to freeze solid
- a nail
- a hammer
- a tea light
- a durable, soft surface (e.g., old, double-layered blankets, or even better: a grassy field)
Instructions:
Use the nail to punch patterns—such as stars, letters, or zigzag lines—into the can. If you want it to be absolutely perfect, first draw the pattern on a piece of paper (measure the circumference and height of the can) and then secure the pattern sheet around the can with tape. Finally, place the tea light inside the can, light it, and you’re done.
You can simply place the tins on the table or—by attaching a metal hook—hang them from trees and shrubs.
Tips:
The lantern “paints” beautiful light patterns onto the tabletop if you’ve also punched holes in the very bottom of the can.
Don’t be afraid of the hammer and nail. So far, no one has been injured. Even younger children can hammer—they just need enough time.
Each boy should bring his own hammer and nail.
Instead of ice, you can also attach round pieces of wood—sawn flat on one end—to a table using screw clamps. They need to extend slightly beyond the table on one side, so you can place the can over them to punch holes in it.
Nail Wind Chime
Material:
- 15-cm-long nails
- Vise
- Hammer
- Thin wire
Instructions:
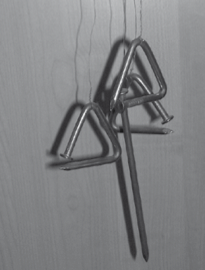
Using the vise and hammer, hammer four nails into triangles.
One triangle is used as the hanger. Another triangle is hung from each corner using wire.
Using wire, attach a straight nail to the top triangle (the hanger). This nail must extend high enough to reach the hanging triangles so that it can strike them when the wind blows. Your wind chime is ready!
Wire Heart
Material:
- Cardboard
- Glue
- Newspaper
- Scissors
- Wire for tying wreaths
- Fire
Instructions:
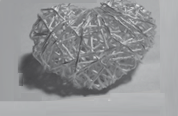
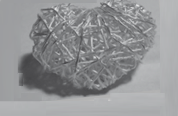
First, cut out a heart (or another shape) from cardboard. Glue crumpled newspaper onto the heart to give it some volume.
Next, wrap plenty of wire around the heart in all directions. Twist the end of the wire and tuck it into the center. If you want to hang the heart, you can bend a piece of wire into a hanger and attach it.
Now the hearts can be placed in the fire. The cardboard and newspaper will burn away, leaving behind a wire heart. If you hang it outside, it will rust over time, which looks really nice!
Metal Beetles
Material:
- Tin can
- Tin snips
- Metal sandpaper
- Soldering iron, soldering flux, solder wire, and clamp
- Stone slab as a soldering surface
- 1 mm and 2 mm wire
- Knitting needle
- Combination pliers
- Waterproof felt-tip pen
- Colored spray paint
- Protective gloves
- Glue: Zementit or Uhu Hard
Instructions:
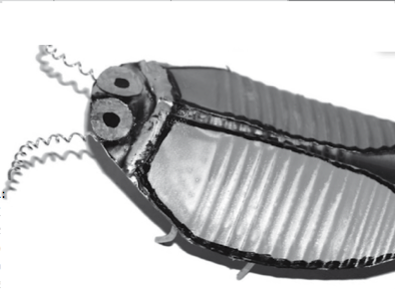
1. Cut off the bottom of the can. Cut open the can with tin snips and flatten the can body slightly.
2. Use a waterproof marker to sketch a beetle and draw it onto the can. You’ll need a beetle body, two beetle wings, and two beetle eyes (see picture).
3. Cut out all the pieces with tin snips. Be careful—there will be sharp edges! It’s best to wear protective gloves. Then sand down the edges.
4. Now you can spray-paint the wings any color you like and let them dry thoroughly. Once dry, trace the outlines with a waterproof marker.
5. Beetle legs: Cut 11 cm of 2 mm-thick wire and bend it into the shape of legs.
6. Antennae: Cut a 10-cm piece of 1-mm-thick wire and twist it around a knitting needle.
7. Soldering: Place the beetle’s body face down on the stone slab. Sand down the areas where the legs will be soldered. Secure the wire legs with a clamp. The beetle must be positioned securely so it doesn’t slip. Apply soldering flux to the soldering joint and solder on the legs. Solder on the antennae in the same way.
8. Turn the beetle over so that its back is facing up. Now solder the wings to the front section (behind the head). Do this exactly as you did with the legs: sand down the soldering area, clamp the wings in place, apply soldering flux, and solder them on.
9. Finally, glue the eyes in place using Zementit or Uhu Hard Glue.
LED Figures
Material:
- Resistors
- 9-volt battery
- LED
- 9-volt push-button connector
- Small wooden board (approx. 5x5 cm)
- Drill or awl
- Hot glue (if needed)
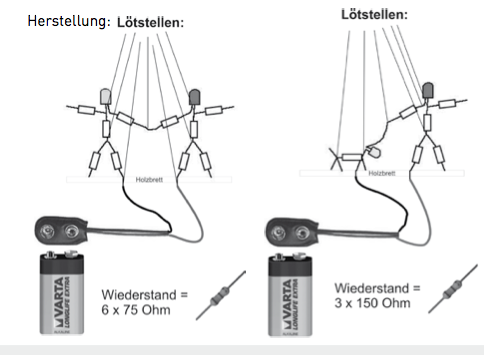
Solder the figures together using the resistors. Drill two small holes in the wooden board. Insert one leg from each figure through these holes and solder them to the ends of the push-button connector. To keep the figure standing, you may need to secure it to the board with hot glue.
Important points:
At an operating voltage of 9 volts, the total resistance of the resistors connected in series with the LED should be approximately 450 ohms.
The figures must touch the “ground” at two points so that current can flow in and out.
For example, the figure could be holding something in its hand that touches the ground (a walking stick).
Or two figures can hold hands, with each providing a path to ground.
Or an LED figure could hold an LED dog on a leash, through which the current can flow.
Tip:
If you’re not very familiar with this area, you should seek help from an electrician or electronics technician.
LED Figure
Working with Soapstone
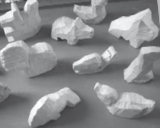
Soapstone is a wonderful material to work with. You can saw, drill, file, and sand it. You should buy soapstone by the kilogram from a wholesaler rather than at a craft store (it’s much too expensive).
For example, from:
www.speckstein-produkte.ch Andreas Reist
Buchlistrasse 19
4704 Niederbipp
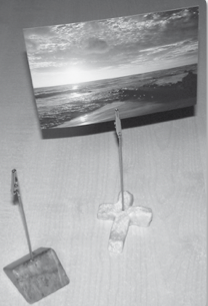
You can also find ready-made products there. For example, soapstone with pre-drilled holes for tea lights, card holders, or pendant charms, etc.
Once you know what you want to make from the stone, start by sawing it. Then continue with coarse files and rasps. So you always work your way from coarse tools to finer ones. The same applies to sandpaper. Start with coarse sandpaper, then move on to finer and finer grits. Finally, sand the stone with wet sandpaper in a basin of water. After that, you can buff the stone with a polishing cloth. At the very end, the stone is warmed up with a hair dryer. Once it’s nice and hot, the object is treated with wax. The wax is applied to the stone with a soft cloth. Now the piece is finished.
If you want to make a card holder, you’ll of course need to drill a hole for it first, then glue it into the stone with hot glue after waxing.
Warning:
There are also cutting tools for soapstone. However, these curved knives are so sharp that they can sever a tendon in an instant! They are therefore not suitable for children’s hands!
Effervescent Tablet Rocket
Materials:
- Empty movie canister or effervescent tablet tube with a tight-fitting lid
- Water
- Effervescent tablet
Instructions:
This rocket should only be launched outdoors, because the splashed water gets incredibly sticky afterward!
Fill the can one-third full with water. Then add one-quarter of the effervescent tablet and quickly close the lid. Next, place the can on its lid and wait for the rocket to launch.
Caution: Do not lean over the rockets—sometimes there are duds that can still go off after a while.
References

- Content and images: Forum Kind, Issue 2/10, pages 18–20. Crafts for boys: getting creative with cans, nails, LEDs, and building a rocket. © Copyright www.forum-kind.ch
- Author: Mirjam Leuenberger
- Anmelden oder Registrieren, um Kommentare verfassen zu können