Instructions for making your own wax torches
Homemade wax torches
A warm summer evening or a starry night are perfect for a night hike. Of course, the best way to do this is with your own torches!
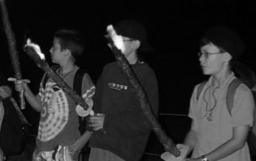
This is what the children at the trapper camp in St. Stephan experienced. The trappers enjoyed walking through the night with their homemade torches!
Material
- Stick: 80cm long
- Jute strips: 20cm wide, 1 meter long (or jute tape by the meter, available at Landi)
- Wire: 1 or 1.5 mm thick, galvanized (Landi); side cutters
- Wax scraps (a lot of wax is needed)
- Tins and old pans for melting the wax.
- Adhesive tape, cardboard, pencil, scissors or cutter
- Plastic base
Preparations
The area where the torches will be made should be covered with plastic. Plastic should also be laid out where the soaked jute strips are to be wound up. This applies both indoors and outdoors!
Put a plastic apron on the children to protect their clothes.
Make an apron: Cut the plastic sheet to a length of approx. 2 m (depending on the height of the children), make a slit in the middle for the head. Tie the apron around the belly with a string. For plastic rolls: Ask banks or insurance companies. Some of them have plastic rolls with advertising on them as tablecloths for parties!
Preparation
Melt the wax in a bain-marie. Have jute strips, stick and wire ready. First dip a short piece of jute into the wax and then roll it up into a wick (you can also use the seams of jute sacks as a wick). Now dip the jute strip into the liquid wax in the tin, pull it out again and allow it to drip off. Dip the other end into the wax. Now wrap the soaked jute strip tightly around the stick from the end. Wrap the wick tightly so that only a small end is sticking out at the top.
Wrap the wire around the lower end and secure it. Wrap the wire tightly around the torch. First from the bottom to the tip and then back again (so it goes around the stick in a criss-cross pattern). Cut the wire with the side cutter. Twist the two ends tightly together and tuck them well into the torch.
Cut a circle with a diameter of 15 - 20 cm out of cardboard. Cut a cross in the middle of the circle with the cutter. Place the cardboard circle under the torch as a drip guard and wrap it tightly with adhesive tape.
Tips
As the wax is hot, you may need to wear plastic gloves for wrapping (try out what works better for you: with or without gloves).
Smaller children cannot wrap themselves. The children can turn the stick and the leader winds the soaked jute strip and the wire onto the stick.
Work quickly, as the wax quickly sets again.
Secondary occupation
Since not all children can make their torch at the same time, it is absolutely necessary that the other children are also busy in the meantime!
Source reference:
Content and image:
copyright www.forum-Kind.ch, Wachsfackeln, 4/04, page 18
Author: Jürg Niederhauser