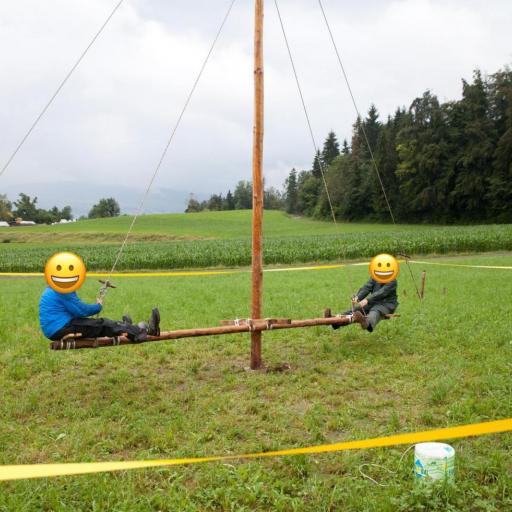
Brief instructions for setting up a carousel in pioneering work.
See also Building a carousel
Instruction
Material: What for
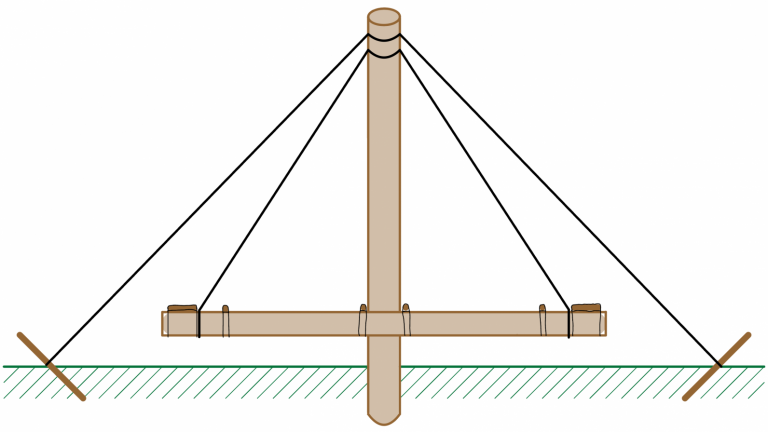
- 1x sturdy log, max. 10m: hang up carousel
- 2x equally long thin/light trunks, max. 10m: rotating beams
- 3x pegs: Brace carousel
- 3x 20m static rope (alternative 1x 20m, 1x 40m): Tension the carousel
- 1x 30m static rope: suspend rotating beam
- 5x carabiners at least: suspend/brace turnbuckle
- 2x boards, approx. 30cm x 50cm: Seats
- 2x slats, approx. 80cm: footrests
- 2x slats, approx. 50cm: Guide for the rotating beams
- Bale cord (many meters): Tying down the elements
- Several stakes: Barrier
- Barrier tape: Barrier
- Optional, 2x battens, approx. 100cm: Diagonal for stiffening
Drain
- Dig hole, approx. 1/10 of trunk length (at 10m this corresponds to 1m)
- Measure and drive in guy posts (distance to trunk = trunk height)
- Tie ropes to the trunk (3 guy ropes: mast throw, suspension: double mast throw)
- Set up the log and brace it
- Place the rotating beams with one thick and one thin end together in the middle of the trunk
- Jack up the turning beam at the end of the beam
- Adjust the distance to the trunk, approx. 2cm
- Tie seat and foot holder tightly (circle collar)
- Tie two laths at a distance of approx. 2cm from the trunk to the turning beam
- Tighten the rotating beam with tensioner, minimum distance to the ground 50cm
- Optionally, reinforce pivoting beam with diagonal braces
- Close off danger zone
- Test carousel carefully
- Make corrections if necessary
Operating rules
- The carousel is operated only by instructed leaders
- Place feet on top and leave them there
- Only ladders operating the carousel are inside the barrier
- Always keep a minimum distance to the ground (50cm), otherwise re-tension (danger of crushing and kinking)
Content may be automatically translated. Help improve the quality of the translation with your editing!


